VSA User Guide
This guide is for all users except the sections marked with an * for Support Coordinators / Administrators only.
For this section, directions will depend on your product. Choose from below.
- Collection-Master
- Q-Law
- Q-LawE
- vMedia (coming soon!)
- vExchange (coming soon!)
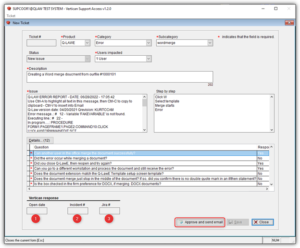
All fields must be completed before a ticket can be submitted. See below for ticket details, which will also serve as an example of a completed ticket.
- Status – click on the dropdown to select a status.
- Product – click on the dropdown to select the product.
- Category – click on the dropdown list to choose the category. Each product will have their own lists. Other is available if the issue does not fit any of the listed categories.
- Subcategory – choose a Subcategory from the dropdown list. When the Subcategory is chosen, a list of questions related to the Subcategory is added in the Details grid.
- Users impacted:
- 1 user
- 2 – 5 users
- All users
- Entire firm down
- Description – Provide a brief description of the issue. This field is limited to 254 characters.
- Issue – Provide details regarding the issue. This is a memo field which allows for detailed information to be added to the ticket.
- Step by step – This field allows the user to provide the exact steps taken that lead up to the issue. This information is critical as it helps the support team respond to and resolve the issue in a timely manner. This is also a memo field to allow complete details to be entered.
- Details – Click Details to bring up a list of questions related to the selected issue for the user to answer. The user must choose a response for each question.
Further down the Details screen, you will be prompted to upload specific screenshots to the ticket. Click the [Browse] button to navigate to the location where you house screenshots and select the relevant one to upload. Screenshots should be PNG or BMP files or part of a Word document.
Note that all fields preceded by a red asterisk (*) are mandatory and must be completed or the user will not be able to complete the ticket.
Once all fields are completed click [Save responses and go back].
Once all fields have been completed click [Save]. The ticket is then added to the firm’s ticket queue and is ready to be reviewed by an Administrator.
As a Support Coordinator ADMIN user, you are able review a ticket and forward it to Client Success or delete a ticket if the issue can be resolved internally.
From the Ticket window, you can review new tickets by checking the box on the right for New issue. After checking that box, go to the Ticket menu and select Edit.

After reviewing the ticket, click the [Approve and send email] button to forward it to Client Success.

If [Approve and send email] is not available to select, the ticket is not complete and must be reviewed for incomplete information i.e., missing screenshots, unanswered question(s), or missing data.
You will enter the following fields manually. These fields are not required but will help you track the ticket.
- Open date of the ticket
- Incident # that you receive from Client Success
- Jira # if assigned by Vertican
If you are a Support Coordinator / Administrator and wish to submit more than one ticket at a time, do the following after approving the initial ticket.
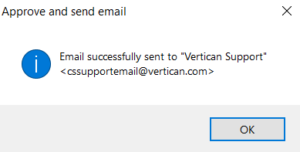
- Click the OK button to confirm that you want to approve and send the ticket to Vertican.
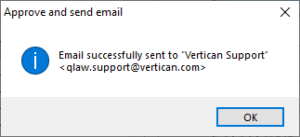
- The confirmation message you receive will display a Vertican email address that depends on your product.

OR

