Last Update: February 4, 2022
USER MANAGEMENT
Table of Contents
Adding a New User
- From the Main menu, click on [Maintenance].
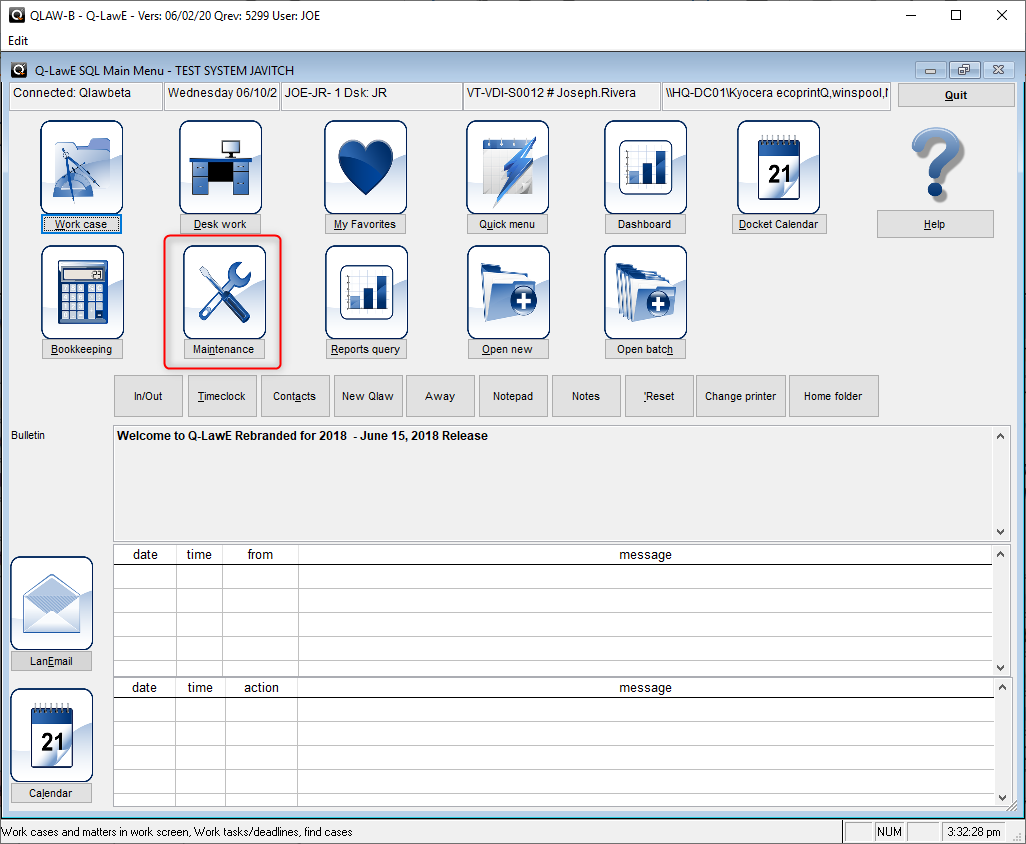
- Choose the System maintenance – Admin tab and click [Users].

- Click [Add new]

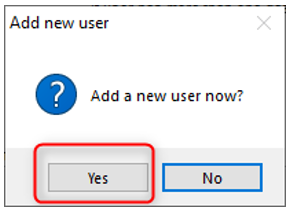
- When prompted, select [Yes].
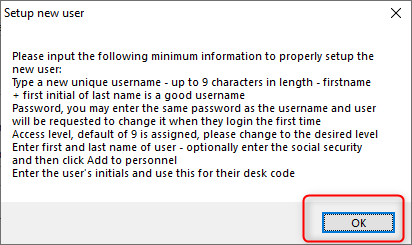
- The following pop-up then appears – be sure to read it. It contains pertinent information on setting up a new user. Once you read it completely, click [OK].
- This will bring up a blank user screen:

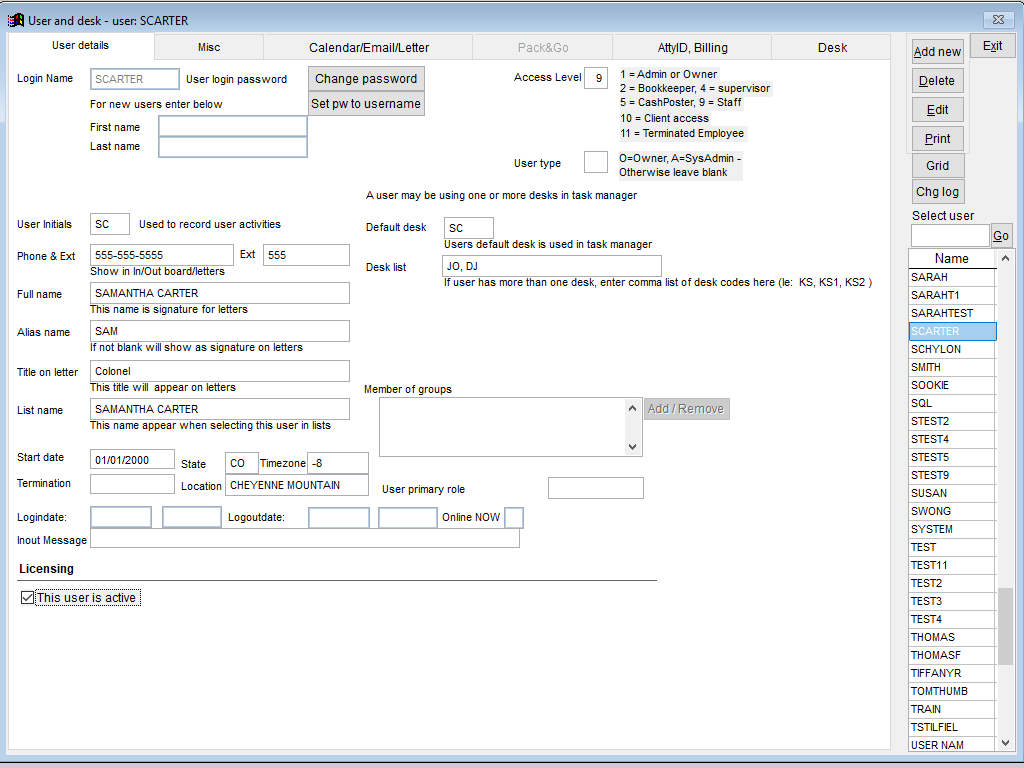
For the User Details tab, populate the needed information. The fields are all self-explanatory; however, the following are mandatory:
1. Login Name – This must be unique and contain no numbers, no spaces, and no special characters.
2. User login password – This will auto-populate with the chosen username.
3. [Change password] – This will allow you to change the password to something unique.
[Set pw to username] – Useful if the user has forgotten password. Clicking it will automatically change the password to the user’s username. User can then log in using the username password. Once logged in, the user will need to change the password.

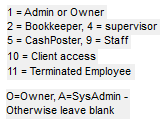
4. Access Level – This needs to be populated with an accurate user level. Refer to the guide next to this field.
5. Default desk – This must be unique. Keep in mind the system does not check if this is unique. The user creating the account must check.
6. First name/Last name – Complete the user’s first and last name.
7. Licensing – Be sure to check the box if the user is active and an unused license is available for the new user.
8. Complete the rest of the applicable fields on this screen such as phone, full name, alias, and title.
9. Desk list – This allows the user to have access to other desks. Simply type the users separated by a comma (e.g., KURT, KATHRYNN, JOEL).
10. Member of groups – This pertains to other desks the user can have access to with LanEmails and calendar items.
11. User primary role – Free form description of users primary role such as: Collector, Attorney, Paralegal, Accounting, IT.
If a user has been terminated and no longer needs the license, you can uncheck it to free up a license to use for a different user. Also, be sure to change the security level to 11 and enter the termination date. If you terminate a person and only set the level to 11 without unchecking the Licensing box, the user will still be able to log in to the main screen of Q-LawE. Also, the license will be considered used by the terminated employee, and you will not be able to use it for another employee. ***DO NOT DELETE THE USER***

Menu Buttons

- Add new – Allows user to add a new user.
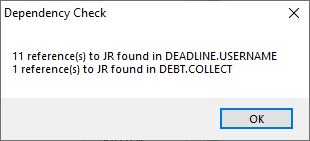
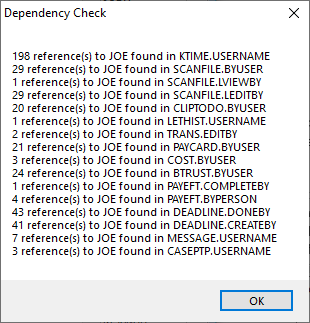
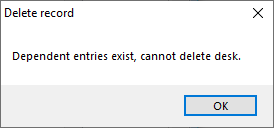
- Delete – Allows user to delete a user; BUT be sure nothing is attached to this user. One example would be desk assignments; make sure nothing is opened with this user. Q-LawE does a dependency check prior to the deletion of a user. See next page for an example of prompts if Q-LawE detects data attached to the user.
- Edit – Allows changes to be made to a specific user. An example would be if user is allowed a different access level.
- Print – A text file will open up in Q-LawE showing the user’s information. Pdf can then be chosen to create/print a pdf file of the information.
- Grid – Shows all users that have been set up in a grid format. The data can be exported to an Excel file. User can also click to edit a record of a user.
- Chg log – Show a history of changes that were done to all users by logging changes made within the userlist table.
Dependency Check Example
Below is an example of prompts that appear when a user attempts to delete a user that has some attachment to file(s). The system will not allow you to delete the user. These are in the order each prompt appears after the previous prompt is acknowledged:

User Details Example
Here is an example of a completed User:
Misc Screen
The Misc screen has added features that are exclusive to Q-LawE.
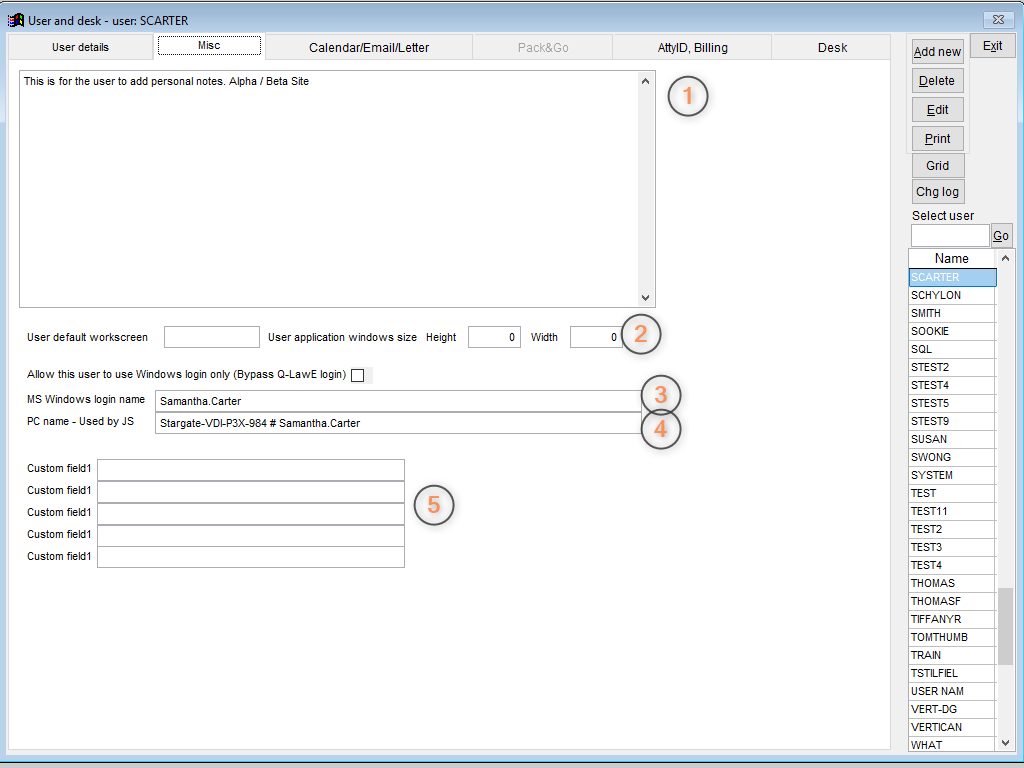
1. Notes – Personal notes can be left here by the user.
2. User default workscreen – This is where user can default it to the Collector screen or WorkScreen, once logged into Q-LawE.
The two boxes that follow are for the height and width of the Q-LawE screen in pixels size (Example: 800W x 600H). These are features exclusive to Q-LawE.
3. MS Windows login name – When you log into your window’s environment, Q-LawE can now allow you to automatically be logged in as that user name. Just add your username that you use to log into Windows. This feature is exclusive to Q-LawE.
4. PC name – Used by JS – If you are running Job scheduler on that pc, be sure to include the pc’s name.
5. Custom fields – You may add any data you wish in field boxes.
Calendar/Email/Letter Screen
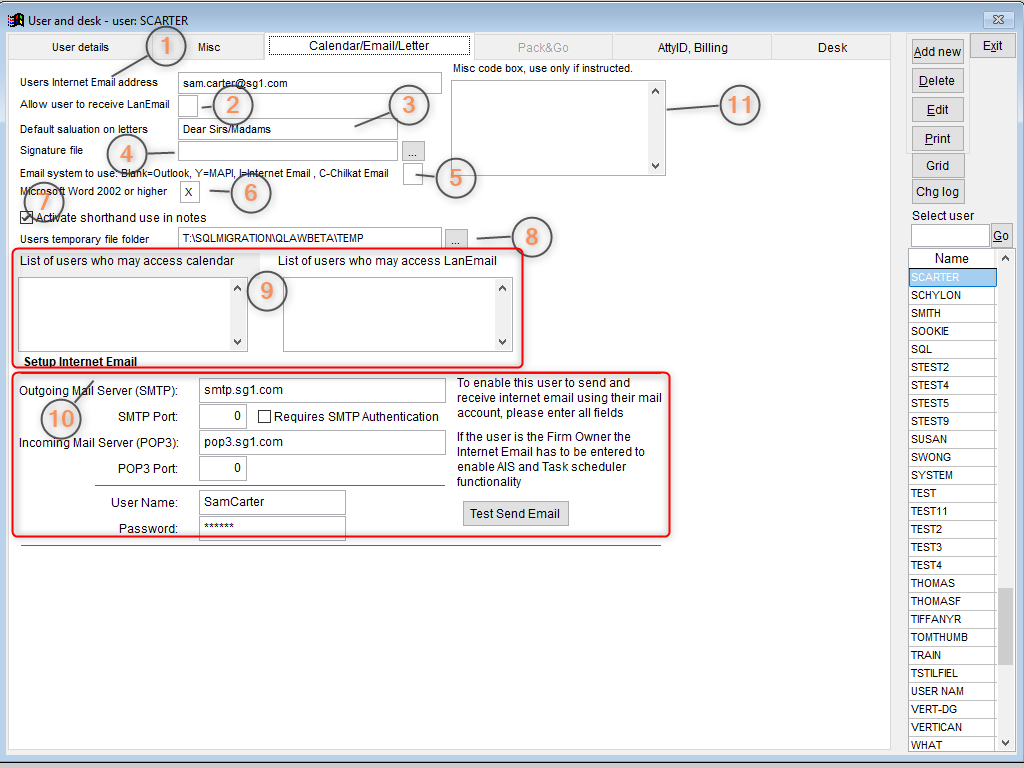
- Users Internet Email address – Enter the email address for the user
- Allow user to receive LanEmail – Enter Y to allow the user to receive LanEmails through Q-LawE.
- Default salutation on letters – Used for Q-LawE letters.
- Signature file – For digital signatures only. Contact Client Services for more information.
- Email system to use – Leave blank for Outlook. Enter Y for MAPI or I for internet email.
- Microsoft Word 2002 or higher – Leave blank if older than Windows Office 2002; use Y for Word 2002 or higher, otherwise it should be blank; use X if your version does not require closing Word before mail merge.
- Activate shorthand use in notes – Check this to allow the user to use shorthand.
- Users temporary file folder (word processing temp file folder) – Input the user’s Q-LawE temporary file location. Most common is C:\Q-LAWE\TEMP1 (this is where temporary merge data will be stored during the merge process).
- List of users who may access calendar or LanEmail – Allows a list of usernames that have access to this user’s calendar and LanEmails. (Keep in mind level 4 users already have access to the calendars and all level 1 users already have access to all users’ LanEmails).
- Setup Internet Email – Leave this section blank unless utilizing internet email account. Place the pop server and smtp server information and the port numbers, then add username and password used to access the email account. Contact Client Services with any questions.
- Misc code box – Do not use unless instructed to do so by a Client Service Representative.
Atty ID 1, 2, and 3
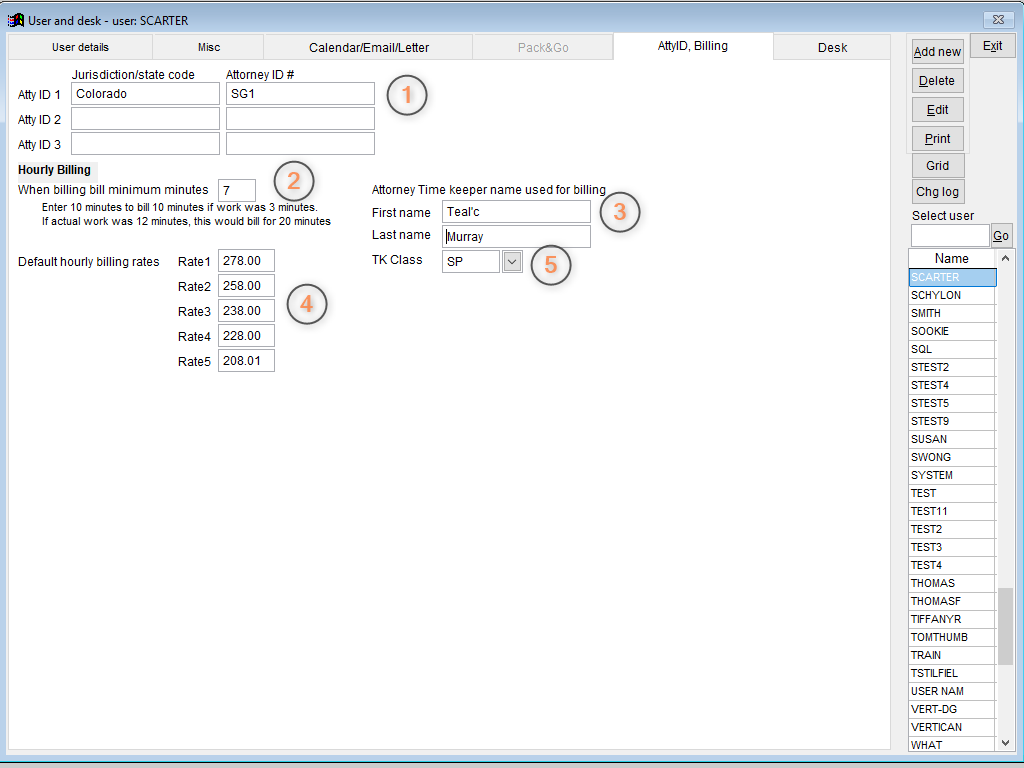
- Atty ID 1, 2, and 3 – Enter the states the Attorney is licensed it along with the Bar ID.
- Hourly Billing – If hourly billing is to be used, enter the number of minutes to be charged at increments. If a 5 is entered, 1-5 minutes worked will all be charged at 5 minutes, 6-10 minutes will be charged at 10 minutes, etc.
- Default Hourly Billing Rates – Enter the hourly billing rates; may enter up to five.
- First and Last Name – Enter the Attorney’s first and last name.
- TK Class – For LEDES billing only; enter the user’s position code (e.g., PT for Partner).
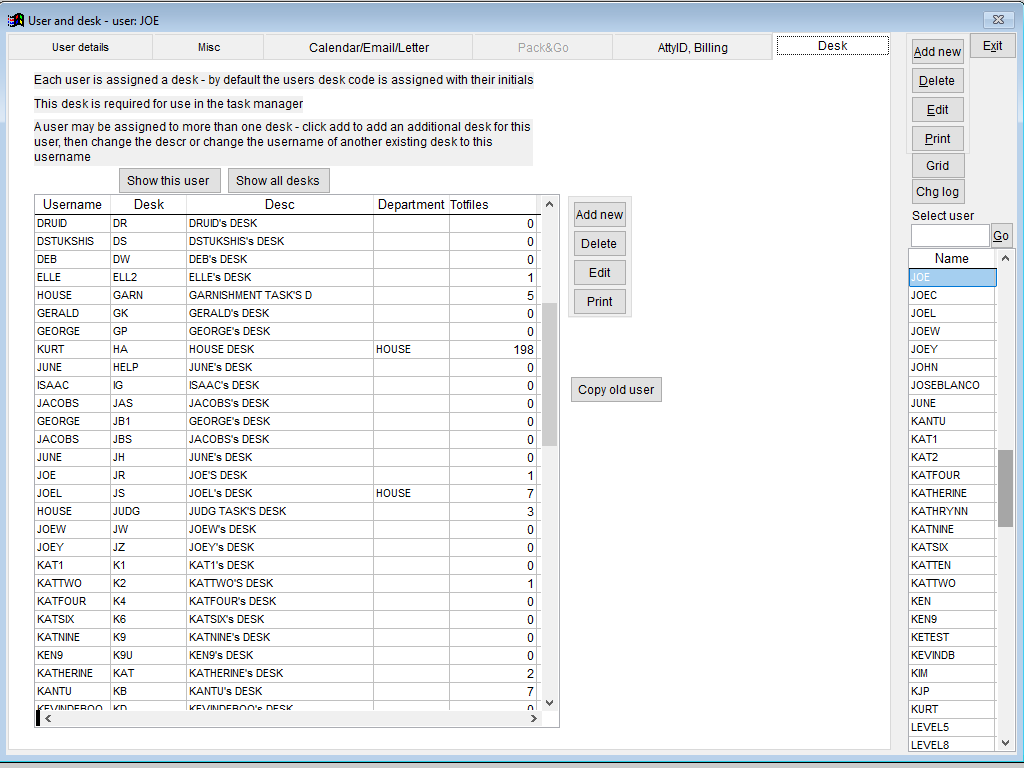
Adding a New Desk
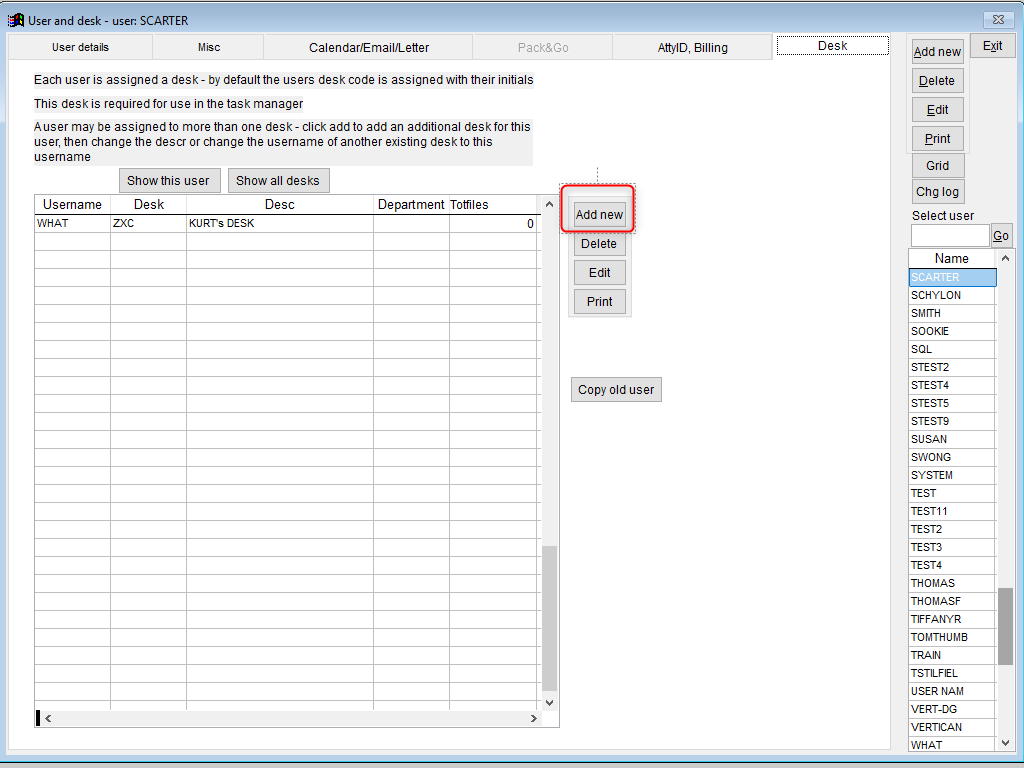
Click [Add new]. Be sure to use the [Add new] button located inside the screen and not the one located to the right of each page. Also, a list of users is located to the far right under Name.
Important: Confirm you are highlighting the correct user’s name on the far-right of the page before adding desks to the user.
Choose [Yes].
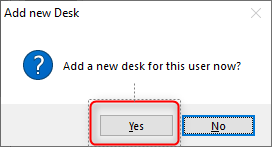
The user’s desk will now be added.
Note: Ensure this desk is unique and matches the desk chosen on the User Details tab.
The desk page explains in detail the reason for desks assignments and how to assign several desks to a user.

