Last Update: February 5, 2022
ATTORNEY MEANINGFUL REVIEW (AMR) USER GUIDE
Table of Contents
Attorney Step by Step Instructions
Overview
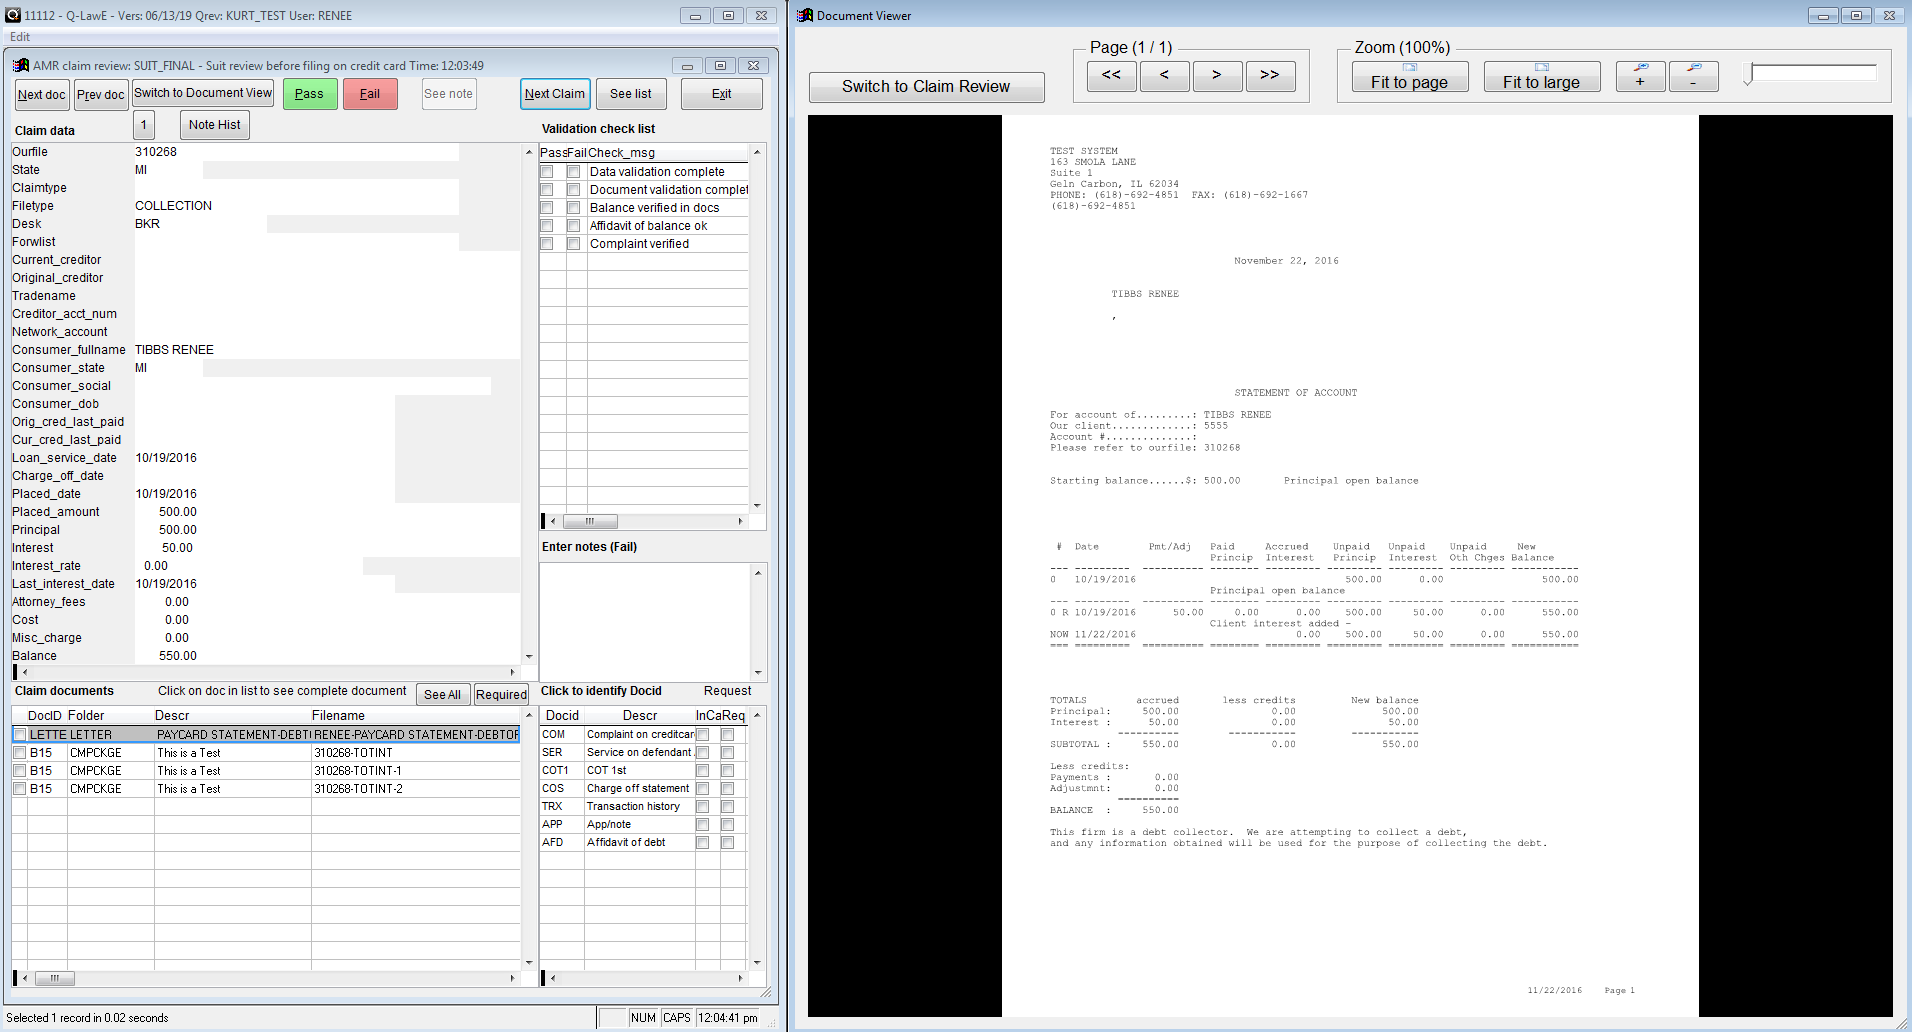
The AMR – Claim Review Screen contains all of the necessary components for a user to adequately perform meaningful review on a claim based on the specifications provided during setup of the AMR.

Claim data
This section of the AMR is controlled by the SQL queries contained in the Fields, Fields2 and Notes1 fields defined in the SETUP AMR. Buttons “1” and “2” display the fields designated in Fields and Fields2 respectively while the Note Hist button will display the paperless notes of the file as designated in Notes1.
Validation check list
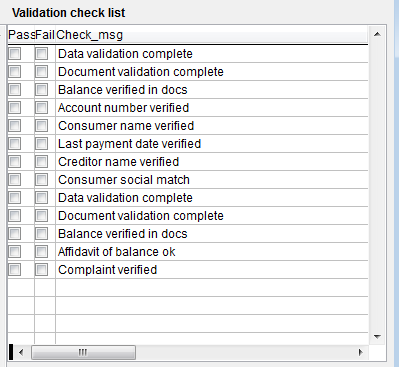
The appropriate condition, either Pass or Fail, should be selected for each item in the Validation check list. In order to Pass the review, Pass must be selected for each item in the Validation check list.

Additional notes can be entered in the Enter notes (Fail) box to explain the reason an item has failed.
Claim documents
Required documents
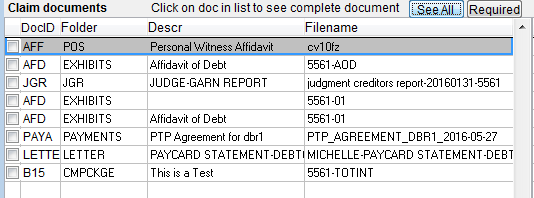
All documents in the ourfile are listed in Claim documents as a default. Use the Required button to view only the required documents. See All can then be used to switch back to viewing all documents.

Document Preview
The Document Viewer is outside the Q-LawE screen. It can be moved to a second monitor or side-by-side with the Q-LawE window for ease of review. The Claim documents window will facilitate which document is in the Document Viewer. The Document Viewer will switch to the appropriate document as the user scrolls through the list or highlights a specific document. The Next doc button will highlight the next document in the list. The Prev doc button will highlight the previous document in the list. Switch to Document View will switch the controls to the Document Viewer window.
![]()
Attorney Step by Step Instructions
Attorney will login to the Select a case screen.
Click on AMR button only visible to attorney.
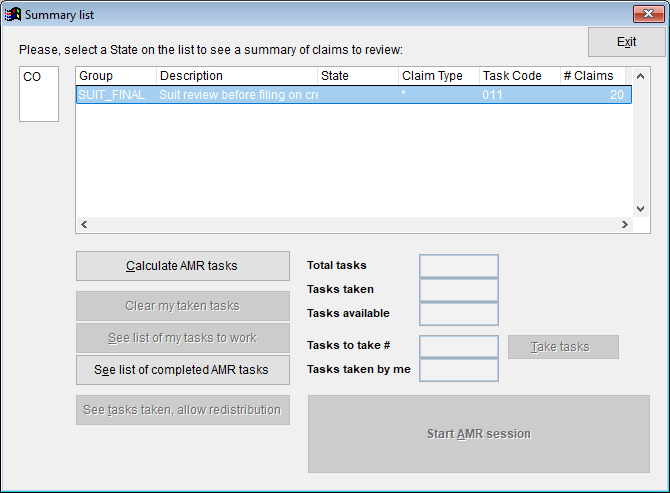
The summary screen will be presented, if attorney is licensed in more than one state, the drop down on the left can be used to select which state to review for. When a state is selected, the main portion of the screen will display the group/ description and the number of claims to review.

1. User will click [Calculate AMR tasks]. The system will query the tasks available to the user.
- If user has been set to be able to enter the state code, the State Code box may be selected for the user to input the 2-character state code. Accounts to Work Now will be limited to that state. The user will click on [Calculate AMR tasks] again to recalculate the tasks based on the state restriction.
2. The user may now enter the number of tasks to begin working; a default number of 50 is preset, but user can enter a different number. For example: The next 50 tasks based on the task list sort order (as determined by manager) will be selected when the user clicks on [Take tasks]. The number of total tasks will be reduced by the number taken. The deadline.prepby field is not set to this user login name and locked for this user.
3. The [Start AMR session] button will change to [Continue AMR session – # tasks remaining]; click to begin with the workscreen of the first account in the list selected by the system.
- Once tasks are taken, the three buttons on the bottom left will be active. If the user wishes to return taken tasks, click [Clear my taken tasks].
- Optionally the user may click [See list of my tasks to work] to view a sorted list of tasks to work. The first account in list will be presented to user, and the order of tasks cannot be changed by the user. The fields in this list are based on the Work Now set up by management.

- The [See list of my completed AMR tasks] will display all completed AMR tasks.
4. The [See tasks taken, allow redistribution] button will display the number of tasks assigned to each AMR user.
- To release the tasks assigned to a user, click/highlight the user and then click on the [Select Record] button. This will prompt a pop-up message asking to confirm releasing the tasks for that user. Select [Yes] to release, or [No] to cancel.
- To review to start with the first claim in the list.
Follow these steps to review:
- Account data,
- Review each required document
- Check the check list items – all are required to be checked to PASS the claim.
- If PASSED, click on the PASS button, then click next claim button to move to the next claim to review. If passed the following occurs.
- The AMR PASSED report summarizing the review is saved in the document manager.
- A brief summary note line is added to account.
- The initial AMR review task is completed.
- The pass Task is added to account.
- DDAS Rule trigger (SYSTEM.AMR) occurs.
- The account is removed from the AMR review process.
- If FAILED, record a note line in the box for specific fail reason if not described using check list fail reason, click on appropriate fail reason and click on the FAIL button.
- The AMR FAILED report summarizing the review is saved in the document manager.
- A brief summary note line is added to account.
- The initial AMR review task is completed.
- The Fail Task is added to account.
- DDAS Rule trigger (SYSTEM.AMR) occurs.
- The account is removed from the AMR review process. It can be reinserted when the fail reasons are resolved.