Last Update: February 8, 2022
INSERTING MERGE FIELDS
Table of Contents
Inserting Merge Fields
Back on the Document Info tab of the Document Detail screen for the template, click [Edit Template] to open Word and the linked document. A prompt will appear confirming that the document is linked to the correct merge source. If it is, click [Yes]. Clicking [No] will break the link and require the user to link a new source.

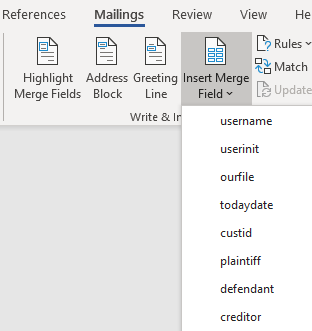
Begin typing the standard verbiage that will appear in the document. When case specific information is required, click the Mailings tab and find the [Insert Merge Field] button in the Write & Insert Fields group.

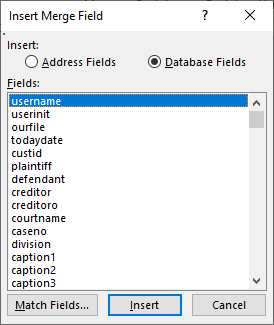
Clicking the top icon portion of the button will launch a separate window where the user can scroll through the merge codes while selecting the bottom portion of the button will open a dropdown to navigate through them; it is user preference which option to use.


As a reminder, the Mergefields grid can be used to help identify what information each merge code returns, and the 20 custom fields appear at the very bottom of the list in Microsoft Word. The code will be inserted at the location of the cursor. When looking at a template, the codes could either appear as ![]() or
or ![]() which is the expanded view; hit Alt+F9 on the keyboard to toggle between the two.
which is the expanded view; hit Alt+F9 on the keyboard to toggle between the two.