Onboarding Guide
Onboarding Steps
- In order to access the links in this Onboarding Guide, you must have vPortal access.
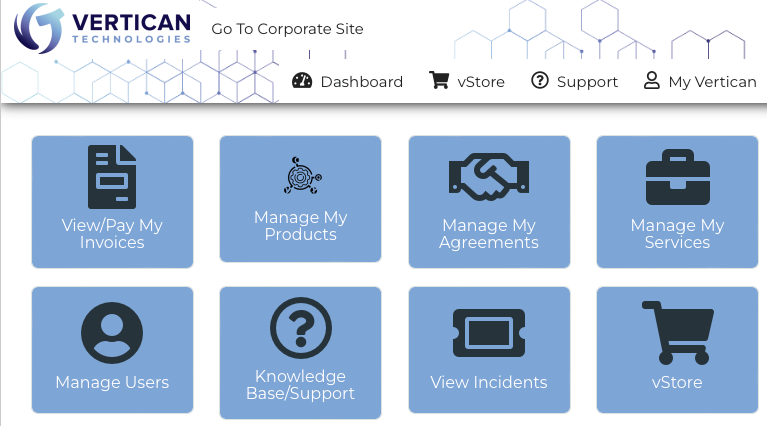
- vPortal is Vertican’s hub for purchasing products, submitting support requests, and finding help information.
.
 .
. - Each firm has one vPortal “Firm Admin” to:
- Receive billing for the firm.
- Grant users access to vPortal.
- Reassign the Firm Admin, if necessary.
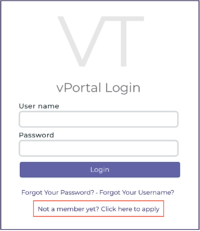
- The Firm Admin should go to vPortal and request access.
- At the bottom of the screen, click “Not a member yet? Click here to apply”.
.
 .
. - Enter your information and click [Submit Form].
- A message will confirm your submission.
- It takes up to 3 business days to process your request.
- You will receive an email from <[email protected]>.
- Please check your junk folder and designate <[email protected]> as a safe sender.
-
Activation Link
- Click the activation link inside the email from <[email protected]>.
-
Confirm Client Registration
- Confirm your Client Name.
- Click the [Confirm Registration] button.
-
Sign the Master Services Agreement (MSA)
- Read the MSA, which sets forth the basic terms and conditions applicable to the licensing of software and provision of services by Vertican.
- Check the “I agree” box.
- Click the [Agree to MSA] button.
- You will see a confirmation that client registration was successful.
- Click the [OK] button.
-
Create New Firm Administrator
- Enter your name, email, and phone number.
- Enter your desired username and password.
-
Sign the End User License Agreement (EULA)
- Read the EULA, which governs the use of Vertican software and services.
- Check the “I agree” box.
- Click the [Register] button.
-
Log In to vPortal
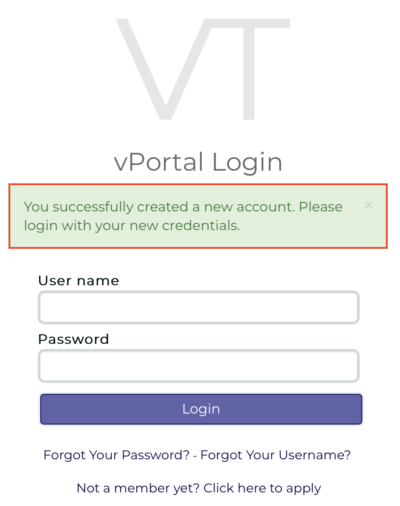
Log In to vPortal
- Now that you have signed the MSA and EULA, purchase your vExchange Mailbox / Support Plan subscription.
- Go to the vPortal page for vExchange Receivers or vExchange Senders and log in.
- You can also navigate here from the vPortal home page > vStore > vExchange > vExchange for Receivers or Senders.
- vExchange Terminology:
- Receivers: Collections agencies and law firms. May be called “vendors” by creditors and debt buyers.
- Senders: Creditors and debt buyers that outsource collections to Receivers. May be called “clients” by collections agencies and law firms.
- Servicers: Another term for Receivers since they service the collection of accounts on behalf of creditors and debt buyers.
Select your Support Plan
- From the Receiver or Sender page, select “vExchange Mailbox and Support Plan.”
- On the Support Plan page, decide on your plan.
- The Silver Support Plan is selected by default, as indicated by the √ above the green [Choose Plan] button.
- The monthly subscription price is displayed, with the number of support incidents that come with the plan.
- Click the green [Choose Plan] button for your desired plan.
- If you purchase in the middle of the month, the prorated price will appear.
Choose Number of Mailboxes
- Next, choose the Number of Mailboxes you wish to have.
- Your first vExchange Mailbox is free with the purchase of a support plan.
- Additional vExchange Mailboxes cost extra and the price is displayed.
- If you want additional Mailboxes, select the number using the toggle.
- Some firms purchase additional Mailboxes for their operations; e.g. a different Mailbox for each state.
- Each Mailbox has a separate vExchange ID and comes with 3 SFTP accounts (i.e., up to 3 users can access each Mailbox).

Implementation Contact Details
- Enter your name and contact information.

Subscription Agreement
- Read the Terms and Conditions of the Subscription Agreement.
- Check the [I Agree] box at the end of the Subscription Agreement.

Add to Cart / Proceed to Checkout
- Click the [Add to Cart] button.
- If you are a Collection-Master firm, you can click [Proceed to Checkout].
- If you are not a Collection-Master firm, a message will appear on screen:
- “Do you also want to purchase the vExchange Native Adapter or the YGC Business Adapter?”
- If you are ready to purchase an adapter, click the appropriate button:
- [Yes, add vExchange Native Adapter] or
- [Yes, add YGC Business Adapter]
- If you are not ready to make a decision:
- Click [No].
- You will receive a message that your selections have been saved for later.
- Click [OK] in the message box.
- You can return later to purchase an adapter.
- Refer to the Buy Business Adapter section below for help making your choice.

vExchange ID
After purchasing your Mailbox, the Vertican Implementations team will send the firm’s vExchange ID to the Firm Admin. Please check your junk folder and designate [email protected] as a safe sender.
- Your vExchange ID is comprised of 3-6 alphanumeric characters.
- You will enter this ID when you complete the Submit SFTP Form step.
- Whenever you communicate with Implementations, it’s helpful to put your vExchange ID in the subject line.
Depending on the context, your vExchange ID may be referenced in other ways:
- Receivers: The vExchange ID is also called the agent_id (when referring to a key), the Receiver Id (in vExchange Analytics), and the FIRM_ID (for those using the YGC business adapter).
- Senders: The vExchange ID is also called the forwarder_id (when referring to a key), the Sender Id (in vExchange Analytics), and the FORW_ID (for those using the YGC business adapter).
Terminology
Vertican uses the terms below to reference various types of data exchange.
- EDI: An Electronic Data Interchange is a generic term for sending and receiving data electronically.
- Business Adapter: Vertican uses this term for an EDI that is programmed from within a Vertican application.
- DTP: Refers to a Data Transfer Protocol that allows different languages and adapters to send data. Typically, Vertican uses the term DTP to refer to programs that communicate with third-party creditors outside the Vertican ecosystem.
Log In to vPortal
- If you didn’t purchase a business adapter when you purchased your monthly vExchange Mailbox / Support Plan subscription, you can do so now.
- Go to the vPortal page for vExchange Receivers or vExchange Senders and log in.
- You can also navigate here from the vPortal home page > vStore > vExchange > vExchange for Receivers or Senders.
Select an Adapter

vExchange Native

YGC Business Adapter

CMvX
Your business adapter options will vary based on your system of record (SOR). If you still have questions after reviewing the information below, contact the Implementations team.
- Collection-Master:
- All Collection-Master firms use CMvX, which is included with your subscription.
- Follow instructions for CMvX setup in the EDI Manual > CMvX > Setup > vExchange Onboarding.
- You may purchase additional business adapters and DTPs depending on the Senders you work with.
- Q-Law and Q-LawE:
- All Q-Law and Q-LawE firms use the YGC Business Adapter, which is included with your subscription.
- Follow instructions for YGC setup whether you use Q-Law or Q-LawE.
- You may purchase additional business adapters and DTPs depending on the Senders you work with.
- Non-Vertican SOR: Receivers and Senders using a non-Vertican SOR will use either the vExchange Native Business Adapter or YGC Business Adapter.
- vExchange Native Business Adapter:
- Why vExchange Native is your best option:
- With 5,000+ vExchange fields, there’s a place for everything.
- Provides enhanced records and fields.
- More data can be communicated but you decide what to populate.
- Facilitates communication between Receivers and Senders.
- Adaptable standard.
- Automatic Receiver onboarding means:
- Senders save on fees to onboard Receivers.
- Receivers can begin receiving claims immediately.
- With 5,000+ vExchange fields, there’s a place for everything.
- You will need to program vExchange Native using internal resources, Vertican Professional Services, or another third-party resource.
- vExchange Native Standard Overview:
- Outlines the standard and what you can expect to use it.
- vExchange Native Standard Field Descriptions:
- Field mappings for each vExchange record.
- Sample of all records for Receivers and Senders:
- Sample Receiver Records for vExchange Native:
- The link will open in a separate tab. To download the file, follow these instructions, which vary by browser.
- Right click or select “File” from your browser menu.
- Choose “Save Page As” or “Save As”.
- Save as a .txt file to your preferred location.
- You may wish to open the file with a text editor such as Notepad++ for easier viewing.
- Receivers send 2000 series records to their Senders.
- The link will open in a separate tab. To download the file, follow these instructions, which vary by browser.
- Sample Sender Records for vExchange Native:
- The link will open in a separate tab. To download the file, follow these instructions, which vary by browser.
- Right click or select “File” from your browser menu.
- Choose “Save Page As” or “Save As”.
- Save as a .txt file to your preferred location.
- You may wish to open the file with a text editor such as Notepad++ for easier viewing.
- Senders send 1000 series records to their Receivers.
- The link will open in a separate tab. To download the file, follow these instructions, which vary by browser.
- Sample Receiver Records for vExchange Native:
- vExchange Native Standard Overview:
- Why vExchange Native is your best option:
- YGC Business Adapter:
- This is an option if you already use YGC and you don’t have the programming resources or time to convert to vExchange Native.
- Please be aware of the following requirements and limitations of YGC:
- Senders must onboard each Receiver separately, adding to costs and time.
- See the vExchange Pricing Chart for the Receiver Onboarding fee.
- YGC is unable to take full advantage of Analytics compared to vExchange Native, because YGC supports fewer fields and records.
- You can only communicate with clients for additional data points by using Notes. There is no field for email in the demographic record.
- YGC is a fixed length data standard, which is more restrictive than vExchange Native.
- YGC is no longer enhanced.
- Senders must onboard each Receiver separately, adding to costs and time.
- YGC Data Standard:
- Covers the minimum records required to get started on vExchange.
- Use these specifications to program your third-party or proprietary interface.
- Alternatively, Vertican Professional Services can configure your SOR.
- vExchange Native Business Adapter:
Purchase Business Adapter
- After selecting your adapter, complete the purchase as you did for the vExchange Mailbox / Support Plan.
-
Your vExchange Mailbox / Support Plan
- Your firm’s vExchange Mailbox / Support Plan subscription includes:
- Up to 3 Secure File Transfer Protocol (SFTP) accounts.
- This means up to 3 people can access each Mailbox.
- Access to the vExchange Analytics website with up to 10 active users.
- Your firm’s vExchange Mailbox / Support Plan subscription includes:
-
Submit an SFTP Access Request
- After you purchase the Mailbox / Support Plan and Business Adapter, complete and submit an SFTP Access Request, which grants you access to your mailbox.
- The vPortal Firm Admin must be logged in to vPortal.
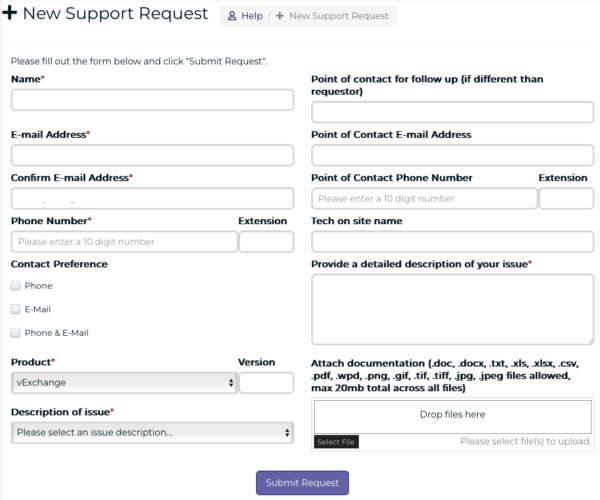
- Create a New Support Request.
- For Product, select vExchange. Leave the Version blank.
- For “Description of issue,” select Request FTP Access.
- In the “Provide a detailed description of your issue” field, enter your vExchange ID.
- You received this ID from Implementations ([email protected]).
- Your ID is comprised of 3-6 alphanumeric characters.
- After you purchase the Mailbox / Support Plan and Business Adapter, complete and submit an SFTP Access Request, which grants you access to your mailbox.
-
Vertican will create your SFTP account(s)
- Each user will receive their SFTP username and password within 3 business days.
- For security purposes, usernames will be sent separately from passwords.
- The username(s) come from [email protected].
- The password(s) come from [email protected].
- Please check your Junk folder and designate these emails as safe senders.
- Please keep in mind that initial SFTP access is only on your side. Once you complete the testing phase, the SFTP access will be enabled on the vExchange side.
After receiving an SFTP username and password, users should login to the SFTP site to verify access and to change the default password that was assigned by Vertican. SFTP login will be required during the testing phase of onboarding so we want to make sure you are familiar with login and experience no issues.
Login Instructions
- Navigate to https://vftp.vertican.com.
- Enter the Username and Password provided to you.
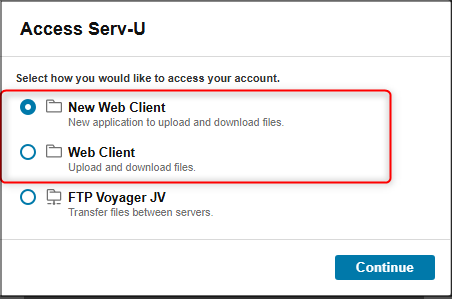
- Choose which FTP interface you wish to use.
- New Web Client and Web Client are the suggested choices, but any can be used.
After Login, Select Business Adapter
After login, you will see folders for the business adapter(s) you are subscribed to.
- CMvX: for Collection-Master firms
- YGC: for Q-Law, Q-LawE, and non-Vertican SOR
- vEx: vExchange Native is for a non-Vertican SOR
Subfolders within Business Adapter Folder
After selecting a business adapter folder, choose one of the following subfolders:
- ToVertican: Used to upload files to vExchange for processing.
- If you are doing business with CA20, you will have a subfolder for their records named “Midland.”
- FromVertican: Contains deliveries from Vertican to you.
- Rejections: This folder contains any rejected files or returned records. This location should be monitored so that any rejections can be corrected and re-uploaded in a timely manner.
- Reports: Will contain any custom reports delivered to you.
- Historical: Used as a data transfer folder. Files placed here will not be processed by vExchange and Vertican does not receive a notification of their upload.
There may be other folders present on the SFTP, but the above three are the main folders a user will be interacting with.
Follow Directions for Your Adapter
Complete setup for your system of record (SOR) to communicate with vExchange, using the approporiate business adapter that you selected for your software and creditor(s). More information on the different adapters can be found in the Buy a Business Adapter section above.
- Collection-Master: All Collection-Master firms use the CMvX business adapter.
- Follow instructions for CMvX Setup in the EDI Manual > CMvX > Setup > vExchange Onboarding.
- Collection-Master firms have the added advantage of being able to go “All In” on vExchange.
- This means all claims will be sent to Senders, which promotes the firm to Senders in the Analytics Firm Claims by State report.
- Read more about Going All In on vExchange and How to Go All In on vExchange.
- Q-Law and Q-LawE: Q-Law and Q-LawE firms use the YGC business adapter.
- Follow instructions for YGC Setup.
- Non-Vertican SOR: Receivers and Senders using a non-Vertican SOR will use either the vExchange Native Business Adapter or the YGC Business Adapter to connect their SOR with vExchange.
- You may need to work with your software vendor to correctly configure your SOR.
- Alternatively, you can engage Vertican Professional Services to configure your SOR.
Testing for Vertican Receivers
Testing for VT Receivers may depend on client requirements. Reach out to your client(s) if you are onboarding or changing adapters.
Testing for Non-Vertican Receivers
Below are instructions for testing as it relates to the vExchange side. Since you use a non-Vertican system of record (SOR), you may need to work with your software vendor so that your SOR executes the required testing actions from your side.
- Alternatively, you can engage Vertican Professional Services to guide you through testing between your SOR and vExchange.
- By importing and exporting mock data, you can validate that your firm’s SOR has been configured correctly.
- For each step, your firm will be asked to confirm testing results, including emails received.
- Delays in response to the Implementations team will delay your onboarding to vExchange.
Test Import Files
The test files below contain the format and layout requirements for testing according to your business adapter.
-
vExchange Native
- Receiver Test Import File:
- The link will open in a separate tab. To download the file, follow these instructions, which vary by browser.
- Right click or select “File” from your browser menu.
- Choose “Save Page As” or “Save As”.
- Save as a .txt file to your preferred location.
- You may wish to open the file with a text editor such as Notepad++ for easier viewing.
- Receivers will test the import of 1000 series records from Senders.
- In this file, replace “FIRM.1234” with your vExchange ID.
- The link will open in a separate tab. To download the file, follow these instructions, which vary by browser.
- Receiver Test Import File:
-
- Sender Test Import File:
- The link will open in a separate tab. To download the file, follow these instructions, which vary by browser.
- Right click or select “File” from your browser menu.
- Choose “Save Page As” or “Save As”.
- Save as a .txt file to your preferred location.
- You may wish to open the file with a text editor such as Notepad++ for easier viewing.
- Senders will test the import of 2000 series records from Receivers.
- In this file, replace “VERT.5678” with your vExchange ID.
- The link will open in a separate tab. To download the file, follow these instructions, which vary by browser.
- Sender Test Import File:
-
YGC Business Adapter
- Before You Begin: Read the important YGC Test File Instructions for Receivers and Senders.
-
- Receiver Test Import File:
- To download the file, follow these instructions, which vary by browser.
- Right click or select “File” from your browser menu.
- Choose “Save Page As” or “Save As”.
- Save as a .txt file to your preferred location.
- You may wish to open the file with a text editor such as Notepad++ for easier viewing.
- Receivers will test the import of Sender records, which begin with numbers 01-28.
- Since YGC is a fixed length data standard, you must input your vExchange ID in the proper column position or the test will fail.
- In the file, replace NJ900 with your vExchange ID following the YGC Test File Instructions.
- Reach out to the Implementations team if you need guidance.
- To download the file, follow these instructions, which vary by browser.
- Receiver Test Import File:
-
- Sender Test Import File:
- To download the file, follow these instructions, which vary by browser.
- Either right click or select “File” from your browser menu.
- Choose “Save Page As” or “Save As”.
- Save as a .txt file to your preferred location.
- You may wish to open the file with a text editor such as Notepad++ for easier viewing.
- Senders will test the import of Receiver records, which begin with numbers 30-99.
- Since YGC is a fixed length data standard, you must input your vExchange ID in the proper column position or the test will fail.
- In the file, replace NJ900 with your vExchange ID following the YGC Test File Instructions.
- Reach out to the Implementations team if you need guidance.
- To download the file, follow these instructions, which vary by browser.
- Sender Test Import File:
-
Test Import Process
- Import the appropriate file above into your SOR.
- Make sure the claims open as expected.
- Send an email to the Implementations team to verify successful import.
- Please include your vExchange ID in the email subject.
-
Test Export Process
- It’s best to create an export with as many types of records as possible.
- For Receivers: 2001, 2101, 2405, 2341, and 2303/2304 (depending on your Sender).
- For Senders: 1001, 1101, 1405, 1341, and 1303/1304
- Check the file for proper format and record layout so the data will not be rejected.
- Follow instructions for your SOR to export the same file that you imported.
- Log In to the SFTP Site:
- Navigate to https://vftp.vertican.com.
- Enter your Username and Password.
- Open the folder for your business adapter.
- Place the export file into your “Historical” subfolder.
- Send an email to the Implementations team to verify successful export.
- Please include your vExchange ID in the email subject.
- Your exported file is checked by Vertican for proper format and record layouts so that data will not be rejected.
- It’s best to create an export with as many types of records as possible.
-
Final Verification
- Once testing of import and export is successful, vExchange will activate your SFTP(s) on the vExchange side.
- Your firm will be notified when you are active and ready to send and receive files.
- After testing is complete and validated by Vertican, the vPortal Firm Admin will be granted access to the vExchange Analytics website. Notification will come from [email protected].
- The Firm Admin will then grant access to other users in the firm.
- Go to the Analytics User Guide. From the left menu, navigate to the Firm Admin section.
- Follow directions for how to manage user access in the Admin Console.
- Your firm is granted up to 10 active users in vExchange Analytics.
- If you have questions about how to grant Analytics access, you can contact the Implementations team.
- If your firm wants help to fully leverage Analytics, you can book a Professional Services training or consultation.
If you have questions about your onboarding process, please contact the Implementations team.
Additional Help
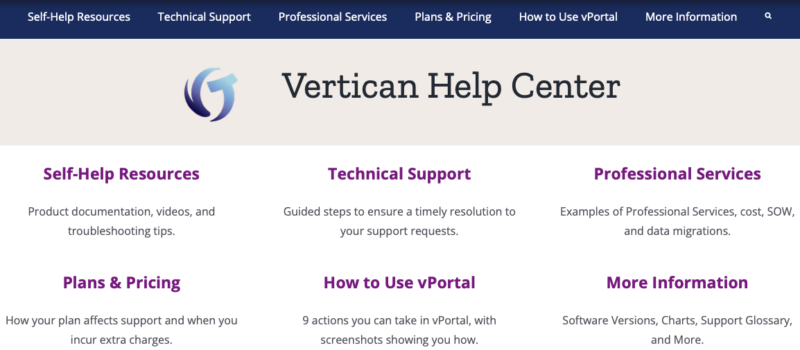
Familiarize yourself with the Vertican Help Center.
- vExchange Help Resources
- Documentation: Information about Status Codes and Record layouts.
- Tips & Troubleshooting: Find information by business adapter.
- Video Library: Scroll down to the vExchange + Analytics tab.
- Release Notes
- Vertican Knowledge Base
- Analytics Help Resources
- User Guide > Firm Admin section.
- Follow directions for granting users access to the Analytics website.
- Tips & Troubleshooting
- Video Library: Scroll down to the vExchange + Analytics tab.
- Release Notes
- Field Mappings
- User Guide > Firm Admin section.
- Resources for Firm Admins
As a vExchange client, you receive dedicated support from a team of specially trained staff.
- How to Use vPortal:
- How to create a new support request.
- How to view your incident balance.
- Purchase Additional Incidents:
- Select vExchange Mailbox and Support Plan: VT Receivers or Senders.
- Select an Incident Type: Support or Emergency Support.
- See prices for additional incidents on the vExchange Pricing Chart.
- If you need more incidents on an ongoing basis, upgrade your vExchange Mailbox and Support Plan for Receivers.
- Open a New Support Request in vPortal.
- Product: select vExchange for both vExchange and Analytics support.
- vExchange Support Plan FAQs
